
As you probably already know, I didn’t start TechTage from the scratch. Instead, I revamped my beloved smartphone and general tech blog and just got a new domain for it. As I didn’t post smartphone stuff or general tech news etc. anymore, soon enough Google was having troubles determining what the site was actually about.
I later came to realise that due to this, and because of the fact that the old site used to contain posts that I wouldn’t say were low-quality, but they certainly were short and lacked depth. I didn’t need those posts anymore (as most were time-sensitive anyway), but I didn’t want to remove them completely either. On the other hand, Authorship wasn’t doing its magic on SERPs for this site and it was ranking horribly. So, I decided to no-index around 1,100 old posts. It wasn’t easy, and WordPress didn’t have a built in mechanism or a plugin which could make the job easier for me. So, I figured a way out myself.
Table of Contents
Part 1: No-indexing Pages
If you are looking to remove many pages of your site from Google or any other search engine’s index, you first need to make sure you’re signalling them to not index them. You could add a meta no-index tag to the <head> section of those pages, block them from robots.txt, modify HTTP headers to add no-index tag, etc.
I prefer to add no-index tags to pages in the <head> section because it:
- is easy to implement.
- preserves your PageRank (as Google is still able to crawl it, they just don’t index it).
And you can choose exactly which pages to no-index and which to leave as they are. But when you have got thousands of pages to no-index at once, that’s when things get a bit tricky.
This is exactly how I managed to add no-index tags to over 1,100 WordPress posts:
1. Install ‘WP Robots Meta’ Plugin by Yoast
You can find it here. It hasn’t been updated in ages, because it has been succeeded by WordPress SEO by Yoast. But nonetheless, it still does its job perfectly fine and is ideal for our job.
2. Open phpMyAdmin
If your web host uses cPanel, awesome! If not, I’m not sure how you’ll get to phpMyAdmin. Once you’re in the cPanel dashboard, you can usually find it sitting inside the ‘databases’ section.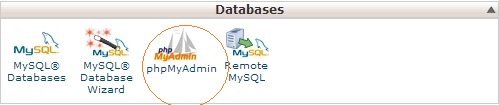
3. Choose Your WordPress Database
Remember, choose the database of the site you’re dealing with. Don’t proceed if you aren’t sure which database belongs to that particular site (shouldn’t be a problem if you have only a single MySQL database on your hosting).

4. Click on ‘wp_posts’
That’s the section which stores all the data about your posts, including robots meta information once you’ve installed that plugin.
5. Choose to Show Only ‘True’ Posts
The ‘wp_posts’ section not only stores information about your published posts or drafts or others, it also stores each individual uploaded attachment, menu items and many other things. So, if you have got a 1,000 actual posts, you might have around 5,000 individual entries in ‘wp_posts’. To see only true posts, you can do the following:
- Click on ‘search’ on the top bar. It looks like this:

- scroll down until you see ‘post_type’. Change the sign next to it to an ‘equals to’ or ‘=’. Type ‘post’ in the adjacent blank field.
 What this does is that it returns only the entries having exactly ‘post’ as the value of ‘post_type’. So it returns only actual WordPress posts.
6. Start Your Work
Now you will have to actually go through the post titles and assign ‘no-index,follow’ tags to posts of your choice.
- There are many columns under ‘wordpress_posts’, so you need to move / reorder (don’t worry, it’s drag-and-drop) the ‘robotsmeta’ column and place it next to ‘post_title’.

- Now, choose as many rows as you’d like to see per page. I generally choose 100. So, that means, I can go through 100 entries without without clicking on ‘next page’ at the bottom.
- Since you’ll be selectively nofollowing the posts, you have to go through each of them, and paste the following in the ‘robotsmeta’ NULL fields (a text-box will appear as soon as you click such a box with a NULL on it): noindex,follow
What is basically means is that search engines will still crawl them, but just not index them. The links on those pages are still followed, so they still pass PageRank to other internal and external pages in spite of being no-indexed.
You might not always prefer this. Let’s say, there are 25 posts on your blog which contain many spammy outbound links. You can tweak the value a bit and input noindex,nofollow in case of those posts.

- This can be time consuming. It took me around 1.5 hours to go through 1,300+ posts and no-index individual posts. But in the end, the effort was worth it because I still was able to no-index specifically the posts that I thought were hurting my site’s rankings. I didn’t have to no-index everything, neither did I have to leave things as they were. If you can’t allot 90 minutes of your time for the task, you can hire someone on oDesk or Fiverr ask him/her to do the job for you based on your instructions.
7. Confirm
After you’re done adding ‘noindex,follow’ to the posts, you should verify whether your efforts were successful or not. To do so, you can download and use the free version of Screaming Frog SEO Spider.
Just input your site URL in Screaming Frog and give it a while to crawl your site. Then just filter the results and choose to display only HTML results (web pages). Move (drag-and-drop) the ‘Meta Data 1’ column and place it next to your post title or URL. Then verify with 50 or so posts if they have ‘noindex,follow’ or not. If they do, it means you were successful with your no-indexing job.

Part 2: Getting The Pages Crawled
Now that you’ve already implemented your no-indexing strategy, you’ll want Google, Bing and other search engines to re-crawl all those pages. It isn’t an easy job, especially if your site is not super popular and thousands of pages of it are already crawled everyday.
Include Them in Your Sitemap(s)
A lot of people think that you should only include pages you want Google to index in your sitemap. Well, it’s absolutely vague. If you want Google to re-crawl something and it’s referenced to from nowhere, chances are — googlebot is never going to find and re-crawl it again.
This is the reason why, no-indexed or not, you should reference to all your internal site pages from your sitemap. Ideally, you should create a central sitemap and list multiple sitemaps containing references to your posts, categories etc. in a hierarchical way.
Remove the ‘Last Modified’ Bit from Your Sitemap(s)
I never really thought Google values ‘last modified’ as much as I saw it doing. I no-indexed those posts on September 28th, around 2 months back.
I just waited for Google to re-crawl them for a month. In a month’s time, Google only removed around 100 posts out of 1,100+ from its index. The rate was really slow. Then an idea just clicked my mind and I removed all instances of ‘last modified’ from my sitemaps. This was easy for me because I used the Google XML Sitemaps WordPress plugin. So, un-ticking a single option, I was able to remove all instances of ‘last modified’ — date and time. I did this at the beginning of November.
Then, this is what happened during the past month:

Awesome, right?
Force Google to Re-crawl Pages of Your Site
Head over to Google Webmaster Tools’ Fetch As Googlebot. Enter the URL of your main sitemap and click on ‘submit to index’. You’ll see two options, one for submitting that individual page to index, and another one for submitting that and all linked pages to index. Choose to second option.
Remember, you get only 10 ‘URL and linked pages submissions’ per month, so use them wisely. As your sitemap(s) don’t have ‘last modified’ information, and you’re asking Google to re-crawl all linked pages (basically everything included in your interlinked sitemaps), Google will re-crawl and update the pages in its index.
Conclusion
So, it’s a pretty nice way to get tons of pages of your site removed from Google’s index in a short time-span. 🙂
I can finish the whole process in 2hrs for 1,000 posts, so it’s time-efficient as well. So, if you’re certain that you need to no-index certain or a thousand pages of your site to lift a Google Panda penalty or any other probable algorithmic penalty aimed at quality, this process should be really handy for you.
Google’s Panda data refreshes occur around once every month right now, so a proper implementation of this process should get your penalty lifted within 2-3 months.
What other ways do you recommend for removing site pages quickly from the index of Big G? 🙂
Brilliant Article Rohit, thanks so much. I have a legit site but I hadn’t noindexed all my category pages, and I think I got hit by the latest “doorway page” update that looks like it came around the start of May or similar time as Mobile update. Thanks again, I really appreciate the post.